Entradas

Mostrando entradas de julio, 2013

Blender Cycles OSL: Gold Material

Imagen
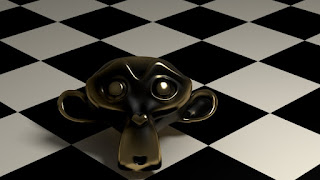
Hi everybody. Today I'm going to show you a migration to OSL of my Gold Material : In that article I used a mix of colors I called Colombia Gold . Here I have called this mix as Egypt Gold . This is the same node setup in cycles without OSL: In most of the posts you can find in Blender Artist , the OSL code is used to get a pattern or a texture. This time I have migrated all the nodes information included in that material to the code, trying to minimize the overhead of the node system. So the OSL code is as follows: /* * Migrated from "http://elbrujodelatribu.blogspot.com.es/2013/01/gold-material.html" * By: elbrujodelatribu */ shader node_metal_gold( color ForeColor = 0.8, color MiddleColor = 0.4, color BackColor = 0.1, vector Normal = N, float ForeRoughness = 0.01, float BackRoughness = 0.04, output closure color Metal = 0.0) { closure color ForeClosure = background(); closure color BackClosure = background(); /...

Copper Material

Imagen
Hi everybody. Today I'm going to show you how to make a copper material: This is the node setup I have used: It is a variation of the Gold Material that I explained in this blog. I think this node group could be useful to get other metal materials. Depending on the references you take , you can find a another cooper more yellowish, like this: You can get it easily tweaking the colors: Bye

Blender Cycles: Cavity or Dirt effect

Imagen
There is a great tutorial about how to create a Dirt or Cavity effect with blender and cycles. You need to use Vertex Paint mode. Here there is an example: And also Oscurart has made an useful addon related to this. Bye

Felt Material

Imagen
Hi everybody. Today I'm going to show you a felt material: There is an interesting thread in blenderartist that you can check to see other realistic materials of this kind of fabric, and more accurate for close-up renders. This is my node setup: As you can see I have multiplied the pattern with a layer weight >> facing node to get the pattern appears in facing angles. The fabric is similar to others of this type, and I have reducing the bumping multiplying by 0.6. If you prefer you can increase this value. Bye

Blender Cycles: Procedural Stars World

Imagen
Hi everybody. Today I'm going to show to you how to make a stars world for cycles. Blender internal has an option in the world settings to create this, but cycles engine hasn't. So I have created a procedural world including galaxies too. First of all we need a texture to show stars. I have taken one node setup from this awesome apple material explained here . It is well explained by its author. It is called Big Dots . Then I need a noise texture to simulate galaxies in astronomy pictures. I have used the following. It is called Noise0Pattern : The next step is setting the noise texture on the world. I have used two Noise0Pattern groups, one for blue/pink light, and another for yellow light. I have also used alpha to be uses as factor for mixing both textures. This is what I have done: I have tweaked the pink/blue color ramp node to establish high and low density areas of stars in the world. After this I can add stars with different sizes and intensiti...

Blender Cycles: Chaining Bump Textures (new feature in 2.68 version)

Imagen
Hi everybody. Today I'm going to show you a new feature appearing in next Blender 2.68: Chaining Bump Textures. Now the Bump node has a Normal vector input, appart from the previous Normal vector output. It works so: As you can see this material has two bump textures. These bump textures can be chained using the new Normal input. This is the result using only the blue frame or first bump pattern, it seems like a kind of damaged wall: And this is the result using two bump textures, now like a terracotta material: This is the bump pattern used in the first image ( Noise2Pattern group node): And this is the bump pattern chained to the previous in the second image ( Noise7Pattern group node): I hope you like it. Bye

Metallic Paint Material

Imagen
Hi everybody. Today I'm going to show you a basic metallic paint material. It looks like this: I have created a simple node group. So you only need to change the PaintColor parameter to get differents colors. The node group uses a facing node to mix two glossy materials. One provides the main color (called PaintColor ), and the other the specular colors. The specular color  is also mixed with the main color to get soft reflections. This is the final result in a scene of mine ( HiRes version is available here ). You can download this material in blendswap . Bye