Hi. Today I'm going to show you a fabric for upholstery material:
This is the main node setup. It is divided into two blocks: bumping and fabric material.
The fabric bumping consists of a subtraction of two colors from wave texture nodes (bands option). I have added a power node and a color ramp node to make the color transition of the pattern sharper.
The synthetic fabric consists of a material with fresnel and facing reflections. The diffuse node uses Oren-Nayard algotithm (its roughness is higher than 0.0), and the glossy nodes also have a high roughness. The setup is as follows:
Here theres is a simple test. Hires version here (model by Klaus Gollwitzer, @iamklaus):
Bye
lunes, 22 de abril de 2013
jueves, 18 de abril de 2013
Dark Metal Material
Hi everybody. Today an easy but interesting material. Dark metal, useful for kevlar helmets or certain parts of robots.
The node I have used is the same mango node of other posts. This is its setup:
Bye
The node I have used is the same mango node of other posts. This is its setup:
Bye
martes, 16 de abril de 2013
Blender Cycles OSL: Voronoi Tiles Material
Hi everybody. This code is ported to OSL from a GLSL version. The material looks like this:
The OSL code is as follows:
And this is the node setup I have used in the image before:
You can change the tiles color and the scale in the script node.
Bye
The OSL code is as follows:
#include <stdosl.h> #define TILE_MAX_HEIGHT 0.12 #define TILE_MIN_HEIGHT 0.05 // GLSL function float fract(float x) { return (x - floor(x)); } // GLSL function vector fract(vector v) { return vector(v[0] - floor(v[0]),v[1] - floor(v[1]),v[2] - floor(v[2])); } float rand(vector co){ return fract(sin(dot(co ,vector(12.9898,78.233,0.0))) * 43758.5453); } vector random2f( vector seed ) { float rnd1 = mod(rand(seed), 1.0); float rnd2 = mod(rnd1*2.0,1.0); return vector(rnd1, rnd2, 0.0); } float hash(float n) { return fract(pow(sin(n), 1.1)*1e6); } float noise(vector x) { vector p = vector(x[0],x[1],x[1]); vector d = vector(1.0,30.0,30.0*30.0); vector f = fract(p), p0 = floor(p)*d, p1 = p0 + d; f[0] = f[0] * f[0] * (3.0 - 2.0 * f[0]); f[1] = f[1] * f[1] * (3.0 - 2.0 * f[1]); float t = mix(mix(mix(hash(p0[0]+p0[1]+p0[2]), hash(p1[0]+p0[1]+p0[2]),f[0]), mix(hash(p0[0]+p1[1]+p0[2]), hash(p1[0]+p1[1]+p0[2]),f[0]), f[1]), mix(mix(hash(p0[0]+p0[1]+p1[2]), hash(p1[0]+p0[1]+p1[2]),f[0]), mix(hash(p0[0]+p1[1]+p1[2]), hash(p1[0]+p1[1]+p1[2]),f[0]), f[1]), f[2]); return t * 2.0 - 1.0; } float tile_surface(vector p) { float f = 0.0; f += 0.3000*noise(p); p *= 1.22; f += 0.2500*noise(p); p *= 2.03; f += 0.1250*noise(p); p *= 3.01; f += 0.0625*noise(p); p *= 4.04; return f; } shader node_vornoi_tiles( float Scale = 1.0, vector Vector = P, color ColorTile1 = color(0.77,0.87,0.9), color ColorTile2 = color(0.9,0.9,0.9), output color Color = color(0.0), output color Height = color(0.0)) { color tile_color = color(0.0); float voronoi( vector x ) { vector p = floor( x ); vector f = fract( x ); vector res = vector(1.0); for( int j=-1; j<=1; j++ ) for( int i=-1; i<=1; i++ ) { vector b = vector( i, j , 0.0); vector r = vector( b ) + random2f( p + b ) * 0.7 - f; float d = length( r ); if ( d < res[0] ) { res = vector(d,res[0],res[1]); if (rand(p+b) < 0.5) tile_color = ColorTile1; else tile_color = ColorTile2; } else if (d < res[1]) { res[2] = res[1]; res[1] = d; } } //float h_noise = 0.15*tile_surface((x+dot(tile_color,tile_color))*5.5); float h_noise = 0.15*tile_surface((x+(tile_color[0]*tile_color[0]+tile_color[1]*tile_color[1]+tile_color[2]*tile_color[2]))*5.5); float h = res[1] - res[0] - 0.15*sqrt(h_noise); if (h < TILE_MIN_HEIGHT) { tile_color = color(0.12,0.11,0.09); return TILE_MIN_HEIGHT + sqrt(h_noise); } if (h >= TILE_MAX_HEIGHT) { return TILE_MAX_HEIGHT - h_noise ; } return h; } vector normal_voronoi(vector p) { float d = 0.001; float d2 = 0.02; // Smoothing parameter for normal vector dx = vector(d2, 0.0, voronoi(p + vector(d2, 0.0, 0.0))) - vector(-d, 0.0, voronoi(p + vector(-d, 0.0, 0.0))); vector dy = vector(0.0, d2, voronoi(p + vector(0.0, d2, 0.0))) - vector(0.0, -d, voronoi(p + vector(0.0, -d, 0.0))); return normalize(cross(dx,dy)); } // Shader starts here vector p = Scale * Vector; float color_voronoi = voronoi(p); float light_intensity = 0.5 / TILE_MAX_HEIGHT; vector light = normalize(vector(0.3,0.3,1.0)) * light_intensity; float shade = dot(light, normal_voronoi(p)) + 0.5; // Outputs Color = tile_color; Height = color(shade * color_voronoi); }
And this is the node setup I have used in the image before:
You can change the tiles color and the scale in the script node.
Bye
lunes, 15 de abril de 2013
Marble / Stone Material
Hi everybody. Today I'm going to show you a marble / stone material.
I have used two wave textures and a color ramp node to generate de base color of this material. After that I have added a translucent shader to get some light absortion, and the normal fresnel-glossy mix to get reflections:
The colors of the ramp are: #523025, #8C5947, #BC8F79, #A9765F, #BC8F79, #8C5947, #BC8F79, #8C5947, #C2AEA7 and #C29B89.
The marble patterns are mixing using screen option, which produces a clearer image, and are like these:
One is more scaled to produce little details inside the main wave texture.
If you want to get a fast version of this material you can remove the translucent shader node. This node makes the render slower. You will get this material:
Here there are other renders:
I hope you like it.
EDIT: Now you can download these materials in blendswap.
Bye
viernes, 12 de abril de 2013
Ancient Gold Material
Hi everybody. Today I'm going to show you an ancient gold material. This is a variation of the material shown in this article.
I have mixed two main colors with a facing layer weight node, and included a third color to darken the objects backwards, in this case with a more pronounced effect.
This is the final node group setup:
You can download this (called colombia ancient gold) and other node setups at blendswap.
Bye
I have mixed two main colors with a facing layer weight node, and included a third color to darken the objects backwards, in this case with a more pronounced effect.
This is the final node group setup:
You can download this (called colombia ancient gold) and other node setups at blendswap.
Bye
Sand Material
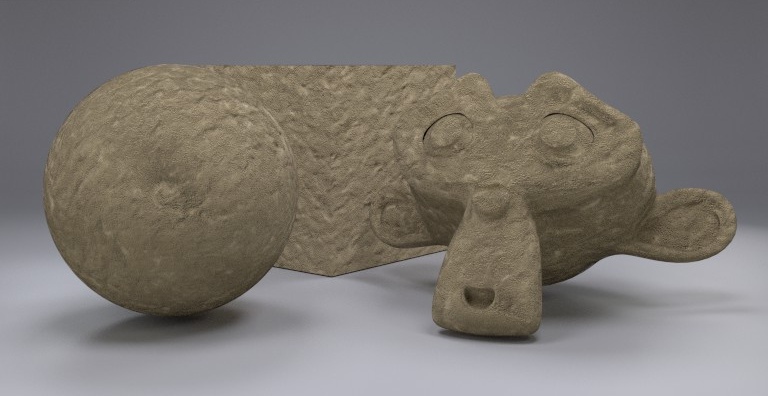
Hi everybody. Today I'm going to show you a sand material:
This material setup is very basic. The secret is in the bumping node.
The base is a noise texture node, modified by a wave node to include grainy aspect in some parts of the sand. You get this plugging the wave node factor to the distortion socket of the noise node. After this, there is a color ramp node wich can modify the proportion between smooth and flat parts. You can see how the pattern is on the bottom-right corner.
Here there is a view of the color ramp node variation:
Bye
jueves, 11 de abril de 2013
Blender Cycles OSL: Mandelbrot Fractal (Interior Colors)
Hi. Today I'm going to show you an OSL code to get a Mandelbrot Fractal with its interior colorized, like this:
You can see a HiRes version in this link.
This is the code:
And this is the node setup to get the image before:
Finally, the osl code is prepared to get a colorized image without using a color ramp node. If you connect the "Color" output socket with the diffuse node, you get this:
Bye
You can see a HiRes version in this link.
This is the code:
#include <stdosl.h> shader node_fractal( float CenterX = 0.0, float CenterY = 0.0, point Vector = P, float Zoom = 1.0, int MaxIterations = 50, color Foreground = color(1.0), color Background = color(0.0), output float Fac = 0.0, output color Color = 0.0) { point p = Vector / (2* Zoom); float auxiliar = 0.0; p[0] += CenterX; p[1] += CenterY; point pa = p; point pb = point(0.0); int i = 0; for(i=1; i<MaxIterations; i++) { pb[0] = pa[0]*pa[0] - pa[1]*pa[1]; pb[1] = pa[0]*pa[1] + pa[1]*pa[0]; pa = pb + p; } auxiliar = sqrt((pa[0]*pa[0]) + (pa[1]*pa[1])); Fac = clamp(auxiliar,0.0,1.0); if (Fac == 0.0) Color = Background; else Color = mix(Foreground, Background, Fac); }
And this is the node setup to get the image before:
Finally, the osl code is prepared to get a colorized image without using a color ramp node. If you connect the "Color" output socket with the diffuse node, you get this:
Bye
Blender Cycles: Append / Link Material or Node Groups
Adding materials or node groups from a blender file is easy. You only need to do the following steps:
1) Go to "File" menu and select "Link" or "Append". Link will use the material/group from the file you select; append will create a copy of the material/group in the opened file.
2) Browse and select the file from which you can get the material / group
3) Then you will see some directories. You can get nodes from three of them:
- Material: you will see all the materials including in the file.
- NodeTree: it contains all node groups of the file.
- World: you can link or append the world node setup from other file.
Select the directory you want.
4) If you select "Material" directory, browse and select the material you want append or link to your file.
If you select "NodeTree" directory, browse and select the node group you want append or link to your file.
5) If you have appended a material, go to the object properties and select the material from the list. You can append world settings in a similar way.
If you have append a node group, go to "Node Editor" window, "Add" menu, and select "Group" and the name of the node group you want to add to your material.
I hope this mini tutorial will be useful.
Bye
miércoles, 10 de abril de 2013
Aluminium Material
Hi everybody. Today I'm going to make an aluminium material, with a
little brushed on its surface.
I have used a double glossy mix for this material. For base color I have used a facing gradient, through a color ramp node and a facing layer weight node:
The brushed pattern consists of a noise node which is stretched by a mapping node. This is colored by a color ramp node:
The stops of the color ramp node are, in RGBA coordenates, #000000FF, #737373BC and #FFFFFF00.
After the brushed pattern I have used a gamma node to make it more subtle.
Bye
lunes, 8 de abril de 2013
Tablecloth Fabric Material
Hi. Today I'm going to show you a tablecloth fabric material:
I have divided this material into three parts:
1) Color pattern
2) Bump pattern, for fabric
3) Fabric or cloth material
First of all, I have done the color pattern using two wave textures, with "bands" option enabled. You get the tablecloth color with the color mix node (mix option). I have also used a "MapRange" node, which I saw in some thread in BlenderArtist, to get sharp borders in this pattern.
Secondly, I have done a fabric bump pattern, again using two wave textures. This time I have mixed them with a subtract color node. See right side for an example image.
I have flattened this bump pattern with a gamma node (value 3.0), which makes the color of the pattern darker and therefore more flat. Besides I have reduce the strength of the bump node to 0.5.
Finally, I have used both pattern in a cloth material, similar to the one shown in Camouflage Material. I have used diffuse node with roughness value 1.0, so it uses oren-nayar algorithm. I think this is more appropiate to simulate cotton tablecloth.
Here there is a test of this material (model by Dale Cieslak, @sizzler):
Hires version here.
You can download this material in Blendswap. I hope you like it.
Bye
miércoles, 3 de abril de 2013
Blender Cycles: Gradient Textures
Hi. Here is the node setup to use gradient textures in cycles (linear gradient):
Same setup with radial gradient:
Bye
Same setup with radial gradient:
Bye
lunes, 1 de abril de 2013
Worn Leather Material
Hi. Today I'm going to show you a worn leather material. This is a version of my previous black leather material.
To make this, I needed two things:
1.- including noise in the color material.
2.- making wrinkles appear clearer in the material, like worn leather.
So I have changed the leather group to include another ramp node for getting a clean leather pattern (second point), without any transitions. Using its constant mode you get this.
Then I can change the color only for the wrinkles using this new socket (called pattern). I have added a kind of threshold (0.3 value in the image) which let me make the wrinkles thicker or narrower.
The final node setup is as follows:
The node setup for diffuse/glossy shader is the same as black leather.
You can download this material and others with different colors at blendswap.
Other renders:
Bye
Suscribirse a:
Entradas (Atom)